Introduction
Deployment of Windows Application has always been a not-so-easy task. We had to create Deployment Project, ship it via some media and then it had to be installed to make the application available to use. Moreover, maintaining or managing updates and patches were even more challenging. ClickOnce technology introduced with .NET Framework 2.0 takes care of all the challenges of conventional Windows Application Deployment Issues. Let us get into the core of it.
Key Features of ClickOnce Technology
- We can develop Windows forms application and by using the Publish option to deploy the application onto any of the following locations: File System, Local Web Server, FTP Site, or a Remote Web Site.
- Once the application is deployed onto the target location, the users of the application can browse to the publish.htm file using any web browser and install the application onto their machine. Note that publish.htm file is the entry point for installing the application.
- Once the user has installed the application, a shortcut icon will be added to the Start Menu and also the application will be listed in the Control Panel/Add Remove Programs.
- When the user launches the application again, the manifest will contain all the information to decide if the application should go to the source location and check for updates to the original application. Let us say, for instance, a newer version of the application is available, it will be automatically downloaded and made available to the user. Note that when the new version is downloaded, it is performed in a transacted manner meaning that either the entire update is downloaded or nothing is downloaded. This will ensure that the application integrity is preserved.
How It Works
Let us start with a Simple WinForm Application. I have created a Windows Forms Application in C# named ClickOnceDeploymentDemo with one form with a button and added a simple code to display the assembly path with the button click event. Refer to the following screen shots:


When you execute the project, you will see something like the following screen shot:

Now right click the project and click on Properties to get the Property window and then click on Publish Tab for making the settings for deployment. Refer to the following screenshot. I have put in the publish location as a web server path, that can be accessed via web browser using HTTP. Also one can select the availability of application, whether online or offline mode and so on and so forth.

There are additional settings like the Prerequisites for the application to work. By default .NET Framework is selected. One can select additional components that are required to run the application as pre-requisite. Refer to the following screenshot:

Below the Prerequisite button, there is an Updates button for specifying the checking of application updates.

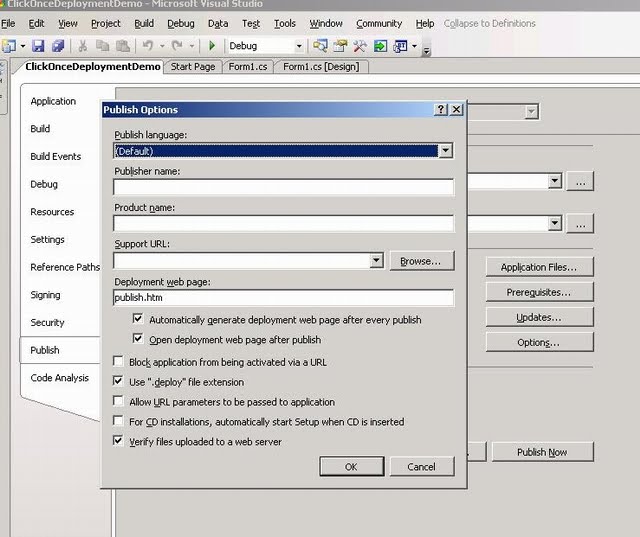
Then Click on Options button to set the Publish Options in terms of language and the web page to get access of the deployment. Refer to the following screenshot:
Once all the necessary settings are done, we can go ahead and simply Publish the application. Right click the Project and click on Publish button and follow the screen instructions for deployment. Refer to the following screen shots:


Clicking Finish will Publish the application for availability over the net. Now you can browse the web folder to check the files and folders that are published.

The following screen shows how to access the published application for installation / deployment.

Click on Install button to install the application:

You will also notice the following changes as a result of the installation:
An icon is added to the Start menu.
An entry is added in Control Panel -> Add/Remove Programs
From this point onwards, you can launch the application through the shortcut in the Start -> Programs menu.
From Add/Remove Programs, you can either completely uninstall the application or revert to the previous version, if there was one.
With every deployment or update over the existing deployment, the same shall be downloaded by the client machine once the connection is available to the server and the client installation gets updated automatically. The client installation checks updates once the application starts.
Conclusion
So, by now we learnt how to use ClickOnce technology to deploy our Win Application and make the same available over the net and how to manage the updates. This was a very simple example.